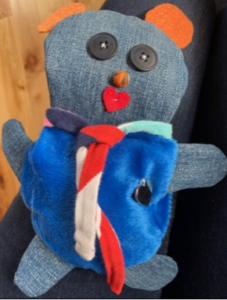
Crafts is a very popular activity at Wawenock, and with the opportunity to make projects like pajama pants, pencil cases, and scrunchies, why wouldn’t it be!? Today’s camp activity suggestion is one we could see being made in our Crafts shop, but is definitely doable at home. A big thank you to the Simard family from Canada who provided the pattern and instructions for this Stuffed Wawenock Bear! Thank you Rose-Melanie and family!

Materials Required: Wawenock Bear Pattern, Old fabric and/or clothes (if you want your bear to be in Wawenock uniform, try to find blue fabric), sewing needles and thread, pins (or safety pins) and scissors. If you don’t have a printer, you can recreate this pattern on paper you have at home. For stuffing: cotton balls, dried beans, or little bits of fabric. Optional: buttons, felt, and permanent markers or fabric pens
How to Build Your Wawenock Bear:
Step 1: Cut all parts of the bear out of the fabric, as indicated on the pattern. Feel free to make it bigger, but don’t make it smaller as it will be difficult to turn inside out.

Step 2 – Bear’s Arms/Legs: Put two pieces of the paw together, with the sides of the fabric you want visible facing each other (Figure 1). Sew around the paw as indicated on the pattern. Sew no more than ¼ an inch from the edge. Flip the fabric inside out. Your 1st paw is ready! You can stuff the paw with cotton balls, dried beans, or small pieces of fabric, or not. The bear in the photo above doesn’t have stuffed paws. Repeat this for all 4 paws.
Step 3 – Head: On one piece of the head, sew or draw two eyes, a mouth, and a nose using buttons, felt, or a marker. Place the ears as shown in Figure 2 below, then place the other piece of the head on top of the one with the face (Figure 3). Secure the two pieces together with pins, needles, or safety pins. Sew around the head as indicated on the pattern, then remove the pins. Turn the head inside out and stuff it.


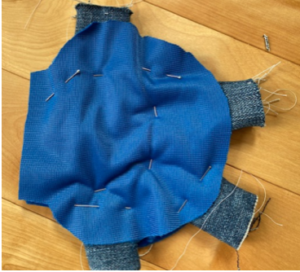
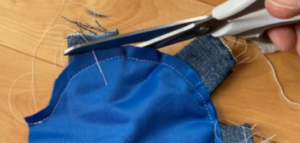
Step 4 – Body: On one piece of the body, position the paws as shown on Figure 4, below. Secure the paws in place with pins. Place the second piece of body fabric on top of the other (Figure 5). Remember to put the side of the fabric you want visible facing inside, since you will turn this inside out. Secure it in place with pins. Sew around the two pieces as indicated on the pattern, then remove the pins. Cut the extra fabric off of the arms and legs (Figure 6), turn the body inside out, and then fill with your stuffing of choice.


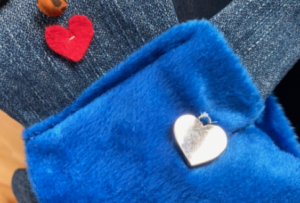
Step 5 – Putting it all Together: Insert the head into the open portion of the body and sew a straight line across the neck of the bear. Add any details you’d like to your bear, like a tie or a heart, or anything that makes you think of Camp (Figure 7)!

*Counselor Hack: Depending on your child’s age, they may be able to do this project independently, or they may need some help from an adult. Remember that what the bear looks like isn’t as important as the process for your child, so allow your child to be as independent as possible.
Happy crafting!